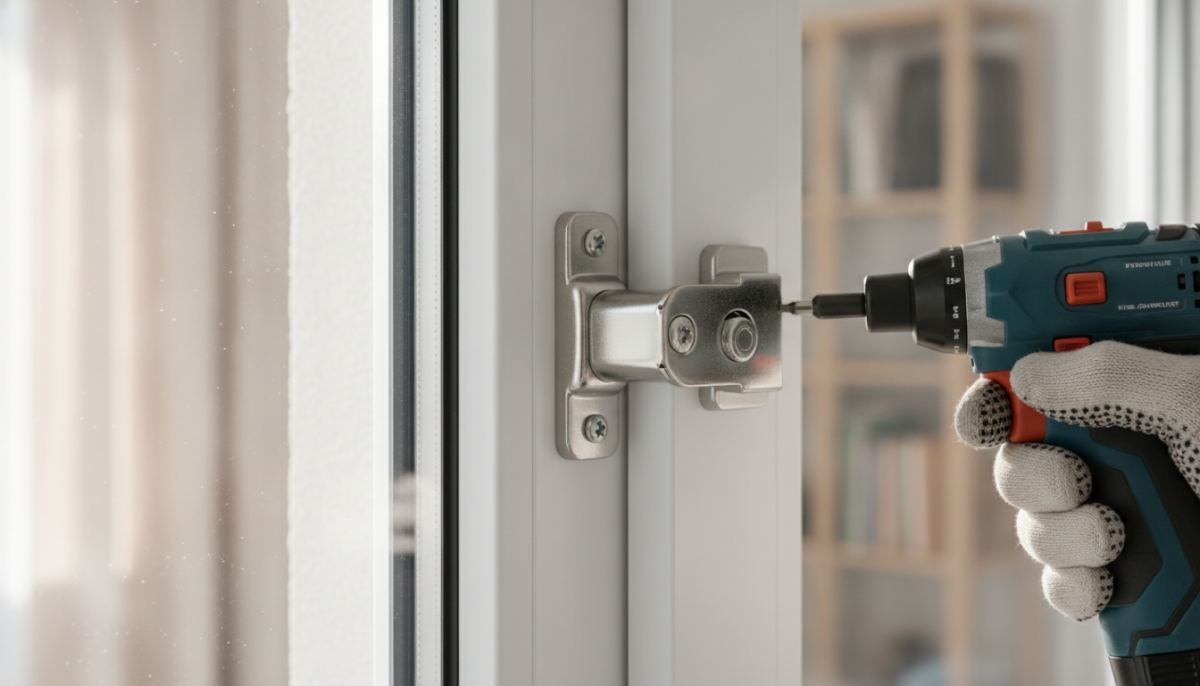
Installing PVC Window Restrictors for Child Safety
Learn how to properly install PVC window safety restrictors for child protection. Follow expert steps on profile reinforcement, screw anchoring, and safety.
Ensuring the physical safety of young children within indoor environments requires continuous vigilance and proactive architectural planning. Whether in modern multi-story residential towers, commercial daycares, educational dormitories, or private residences, windows represent one of the most significant potential hazards. Curious children naturally seek elevated vantage points, and an unsecured window sash presents severe risks. Implementing a certified PVC window safety restrictor prevents the sash from opening beyond a safe perimeter, maintaining crucial fresh air ventilation while eliminating fall hazards. However, the protective value of such hardware depends entirely on the precision and mechanical integrity of its installation.
A safety lock that appears solidly fixed from the outside can fail abruptly under dynamic load if the mounting screws are driven merely into the superficial plastic profile. True child safety hardware installation is not simply a matter of driving wood or drywall screws into plastic casing. The fasteners must penetrate the inner galvanized steel reinforcement channel of the PVC profile, utilize calibrated torque to prevent stripping, and align geometrically with the opening tolerances of the sash. In this comprehensive technical guide, we examine the structural, metallurgical, and practical factors necessary to execute a dependable window restrictor installation.
What Is a PVC Window Safety Restrictor and Why Is It Vital?
A PVC window safety restrictor is a mechanical blocking device engineered to restrict the maximum opening distance of an operable window sash, typically holding it within a clear gap of 10 to 15 centimeters. Depending on the architecture of the frame and the intended operational profile, these devices are manufactured as solid cast metal swing latches, reinforced steel cable restrictors, or concealed pin-locking mechanisms. Their primary purpose is to establish an unyielding physical perimeter that keeps curious children safely inside while allowing uninterrupted air exchange.
Standard multipoint espagnolette handles installed on conventional PVC windows offer minimal resistance against determined tampering. Toddlers and young children frequently observe adult operation and learn to rotate standard window handles in seconds. In contrast, specialized safety restrictors require secondary actions, such as depressing a mechanical latch, disengaging a dual-action trigger, or using a designated physical key. Furthermore, these restrictors act as stabilizing stops, preventing wind gusts from abruptly slamming open sashes shut and pinching little fingers.
The structural efficacy of safety hardware starts with high-grade metal manufacturing. Just as premium locking assemblies rely on the structural density achieved through the cold forging press forming process for internal components, reliable window restrictors require robust cast zinc alloys or forged steel brackets. Flimsy stamped sheet metal or unreinforced plastic latches cannot withstand the sudden shock load of a growing child lunging against an open sash. High-tensile components ensure that the hardware absorbs shear and tensile stress without cracking or shearing under unexpected impacts.
Essential Tools and Pre-Installation Preparation
Executing an installation capable of withstanding industrial safety inspections requires selecting appropriate professional tools and assessing the existing window structure. Before mounting any hardware, inspect the window sash for operational defects. A sash that drags against the sill, sags due to worn hinges, or exhibits loose espagnolette gears must be realigned first. Adding a locking restrictor to a misaligned sash causes ongoing friction, uneven stress distribution, and premature hardware failure.
Prepare the following workshop tools and safety consumables before proceeding:
- Cordless Drill and Torque-Adjustable Driver: An adjustable clutch is critical to drive self-drilling screws securely without over-torquing and stripping the pre-drilled holes in the internal metal channels.
- High-Speed Steel (HSS) Drill Bits: Drill bits sized at 2.5 mm or 3.0 mm ensure clean pilot holes through both outer PVC chambers and internal structural steel plates.
- Self-Drilling Sheet Metal Screws: Corrosion-resistant, zinc-coated or stainless steel screws (typically measuring 3.9x38 mm or 4.2x45 mm) designed with adequate thread depth to anchor into the inner reinforcement.
- Measuring Tape, Square, and Marking Pencil: Precision measuring tools are necessary to mirror strike plate alignments and preserve parallel operating margins.
- Small Spirit Level: Used to confirm that restrictor brackets sit perfectly true, preventing binding during daily sash cycling.
Thoroughly clean the mounting surface of the PVC frame using an alcohol-based degreaser to remove airborne dust, factory oils, and condensation. If the restrictor kit includes rubber base gaskets or modular leveling shims, verify which thickness matches your window’s profile overlap rebate.
Step-by-Step Installation of PVC Window Safety Restrictors
Following a methodical step-by-step procedure guarantees that every screw achieves maximum pull-out resistance and that the restrictor functions smoothly over years of daily operation.
1. Determining the Optimal Mounting Position
Positioning varies based on the design of the restrictor. Cable restrictors and rigid latch arms are commonly installed either near the bottom corner of the sash or along the vertical jamb below the main operating handle. For child protection in residential and educational environments, positioning the restrictor higher along the vertical frame places the keyed lock out of a toddler's immediate line of sight and reach. Conversely, if utilizing bottom-mounted swing catches, placing them along the bottom horizontal rail maximizes leverage against dynamic pushes. Mark the primary mounting points with a pencil while holding the sash shut.
2. Drilling Pilot Holes Accurately
Never attempt to drive coarse-thread screws directly through PVC walls without pilot holes. Driving directly into the profile risks fracturing brittle vinyl, warping internal chambers, and causing the screw to skate across the steel reinforcement plate behind the plastic. Using your 2.5 mm HSS bit, drill straight pilot holes through the marked points, penetrating the outer PVC wall, the internal air chamber, and the galvanized steel reinforcing core.
3. Fastening the Main Body to the Frame
Align the main restrictor housing over the pilot holes on the window frame. Set your cordless driver to a low-speed, medium-torque setting. Drive the anchoring screws straight into the pre-drilled holes until the head seats firmly against the bracket. You should feel sudden mechanical resistance as the screw threads engage the interior steel reinforcement. Avoid high-speed impacts that can ream out the metal threads and strip the pilot hole.
4. Mounting the Strike Plate to the Sash
With the main body secure, close the window sash and align the corresponding strike plate or cable anchor. Allow a consistent operational clearance gap of 2 to 3 millimeters between the components so the sash can cycle closed without pinching the rubber weather seals. Mark the strike plate holes on the sash face, pre-drill through the sash’s internal reinforcing profile, and fasten the strike securely using the supplied hardware.
5. Functional Testing and Resistance Checks
Once both assemblies are bolted down, disengage the catch or unlock the cable to cycle the window through its normal travel. Ensure no scraping occurs against the frame or rubber weatherstripping. Next, engage the restrictor and push the sash outward toward its stopped limit. The sash should arrest firmly at the specified safety aperture (under 10 to 15 centimeters) without flexing the bracket or causing visible deflection at the screw anchor points.
Common Installation Mistakes and Associated Hazards
Minor oversights during hardware installation can lead to sudden structural failures under real-world loads. The most common vulnerability is relying on screws that are too short to bite into the structural reinforcement. The outer face of a standard vinyl window profile is merely 2.5 to 3.0 millimeters thick. Plastic alone exhibits low shear resistance and will strip out easily if subjected to the weight of a child leaning heavily against the pane. Installers must always confirm that the screw length reaches the underlying 1.2 mm to 1.5 mm galvanized steel profile.
Another frequent mistake is disregarding weatherstrip compression. If the strike bracket is pressed directly against the rubber gasket without adequate spacing, the seal will deform permanently. Over time, this leads to draft leaks, noise transmission, and rainwater infiltration during driving storms. Additionally, treating keyed child safety locks like normal latches by leaving the key inserted defeats the entire safeguard. Keys must always be stored in an accessible location out of reach of young children.
Comprehensive security requires equal attention across all building openings. Just as facilities demand millimetric precision when setting up an electric rim cylinder for a building entrance, window restrictors require identical technical discipline to withstand unpredictable dynamic forces.
Maintenance and Long-Term Mechanical Reliability
Mechanical safety hardware should never be treated as a fit-and-forget fixture. Seasonal temperature variations cause vinyl window profiles and metal cores to expand and contract at different rates. Over several heating and cooling cycles, this thermal movement can cause microscopic loosening of threaded connections. Conduct physical inspections at least twice a year to confirm that all mounting screws remain snug and uncompromised.
Clean locking barrels, rotating latches, and hinges with dry, compressed air to eliminate dust accumulations. Apply a small drop of silicone-based or dry PTFE lubricant to the locking mechanism to ensure key pins move freely without attracting dirt. If using flexible steel cable models, inspect the external vinyl coating for abrasions or interior strand fraying. Any restrictor showing signs of metal fatigue, stress fractures, or uncorrectable play should be replaced immediately.
Frequently Asked Questions
Does mounting a PVC window restrictor compromise thermal insulation?
No. When installed using appropriate screw lengths in non-critical frame zones, the restrictor fasteners remain isolated within closed profile chambers. They do not penetrate thermal break barriers or puncture perimeter gaskets, meaning acoustic and thermal insulation performance remains intact.
Can window safety restrictors also prevent forced entry by burglars?
While their primary design focus is child fall prevention, high-grade cast metal restrictors offer valuable secondary resistance against forced entry. They make it significantly harder for an intruder to lever the sash open from the outside, adding an extra defensive barrier to ground-floor or accessible windows.
Can window restrictors be installed without drilling into the profiles?
Adhesive-backed child locks exist on the consumer market, but they are not recommended for genuine life-safety applications. Adhesive bonds degrade rapidly under direct solar heat, humidity, and sudden dynamic pull forces. Mechanical anchoring into internal reinforcement channels is necessary to provide dependable fall protection.
Are safety restrictors compatible with all brands of PVC windows?
Most commercial window restrictors feature universal mounting patterns compatible with standard outward-opening, inward-opening, and tilt-and-turn profiles. Differences in profile overlap depths are easily accommodated using the leveling shims and offset strike plates provided by reputable hardware manufacturers.
Securing Living Spaces with the Right Hardware Solutions
Balancing effective indoor ventilation with uncompromised child safety relies on combining dependable manufacturing materials with meticulous mechanical installation. Choosing hardware forged from proven alloys and anchoring each fastener into structural metal channels ensures dependable protection for years to come. Whether outfitting institutional properties, residential housing complexes, or commercial facilities, working with experienced hardware engineers guarantees superior security outcomes. For technical specifications, custom manufacturing solutions, or comprehensive access control hardware, please contact our team.
İlginizi Çekebilir